

Shredder Blade Damage Identification – All Damage Types, Causes & Image Examples
Release time: 2026-10-14
During the operation of a double-shaft shredder, various types of damage occur repeatedly on shredder blades. Many plant operators cannot tell which type of damage they are facing and what the root cause is. Correct identification of damage patterns helps avoid repeated breakdowns of the shredder system.
Before inspecting the blades, the machine must be fully shut down and locked out to prevent accidental startup. Never reach into the cutting chamber while the machine is powered or unsecured.
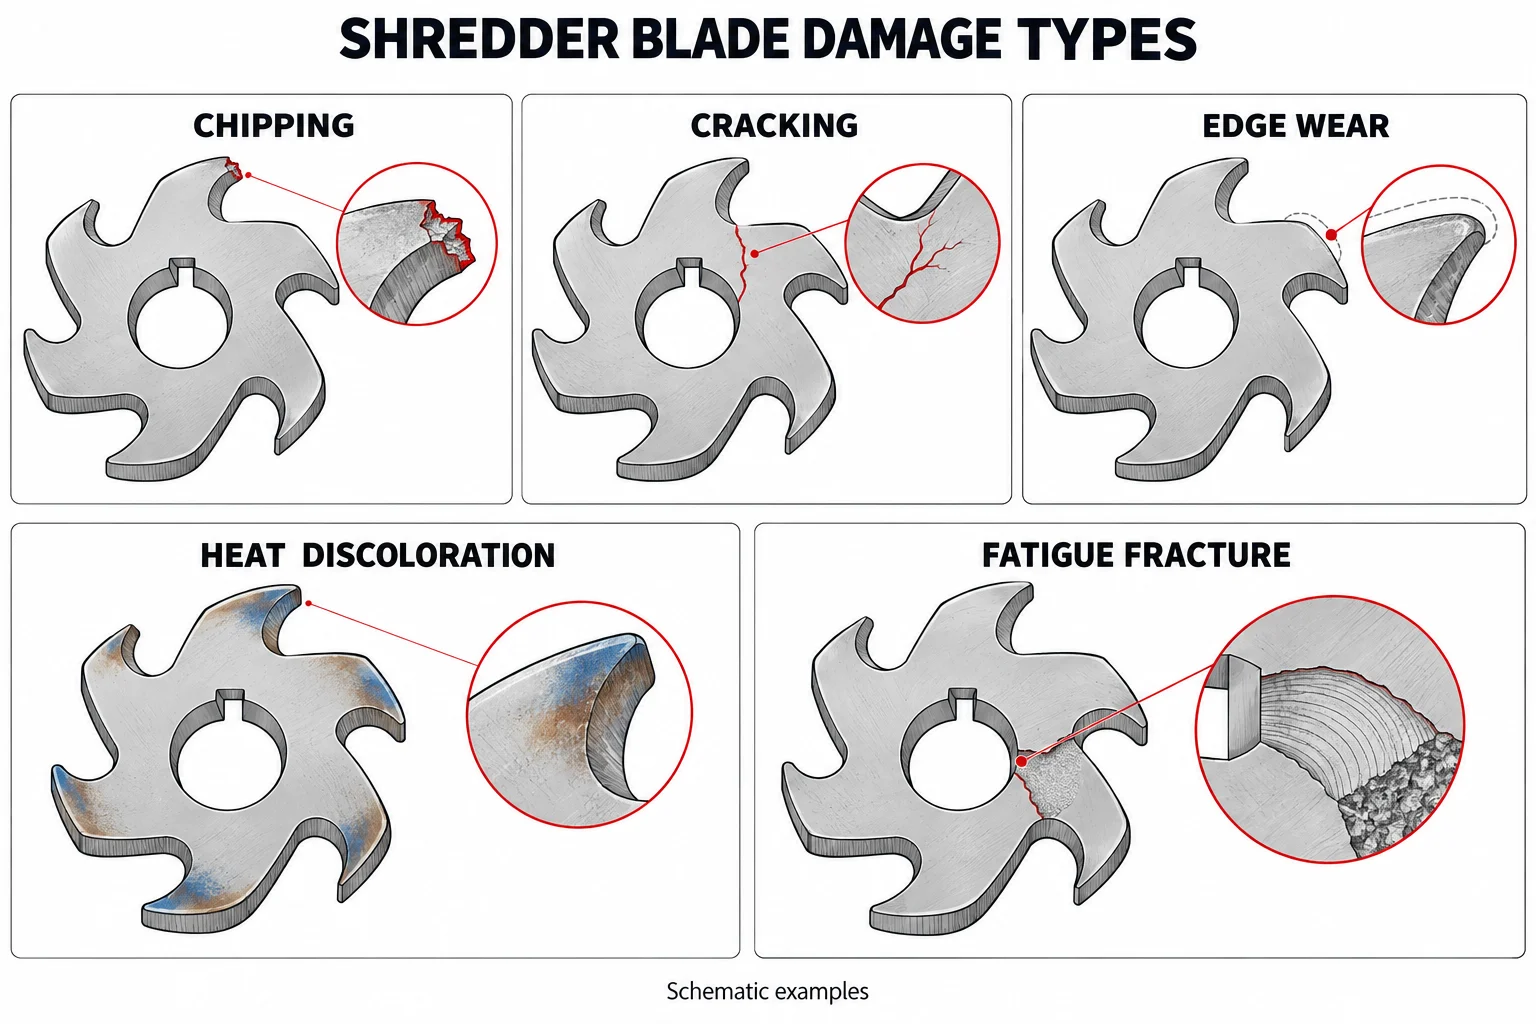
Overview of the main damage patterns found on double-shaft shredder blades.
Main damage types found on shredder blades
1. Chipped cutting teeth
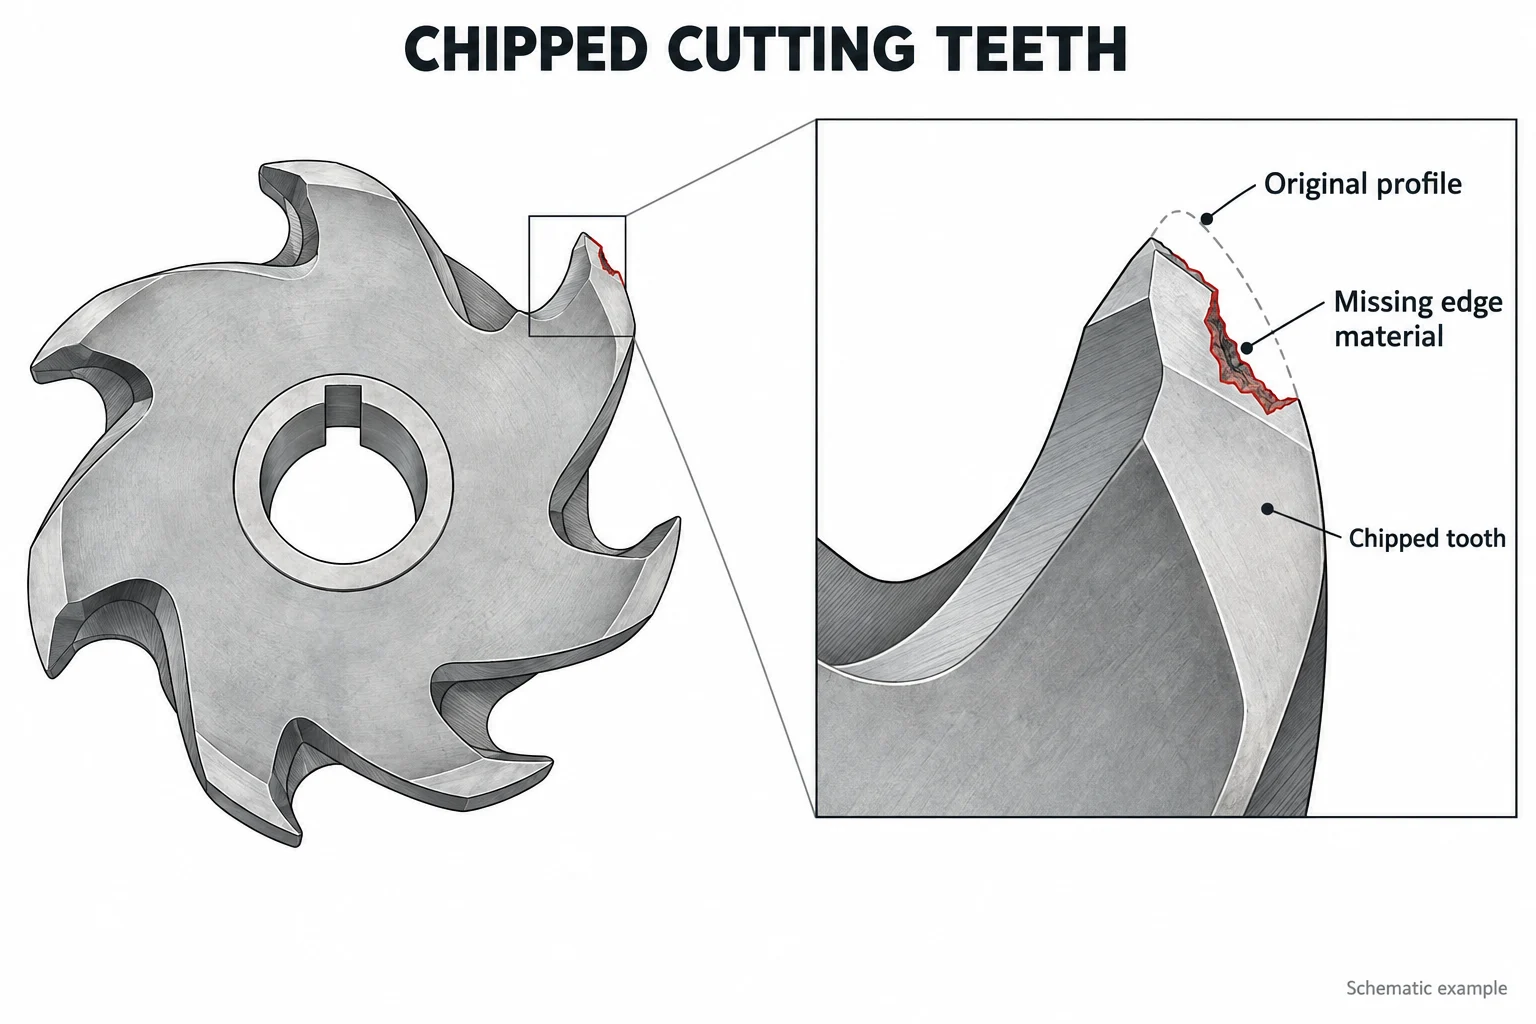
Chipping means material breaking off at the tooth or cutting edge. It is usually caused by hard foreign objects such as stones or metal fragments mixed inside input material. This kind of damage happens suddenly.
Consequences: Uneven shredding, secondary damage to neighboring blades and spacer discs.
2. Cracks on shredder blades
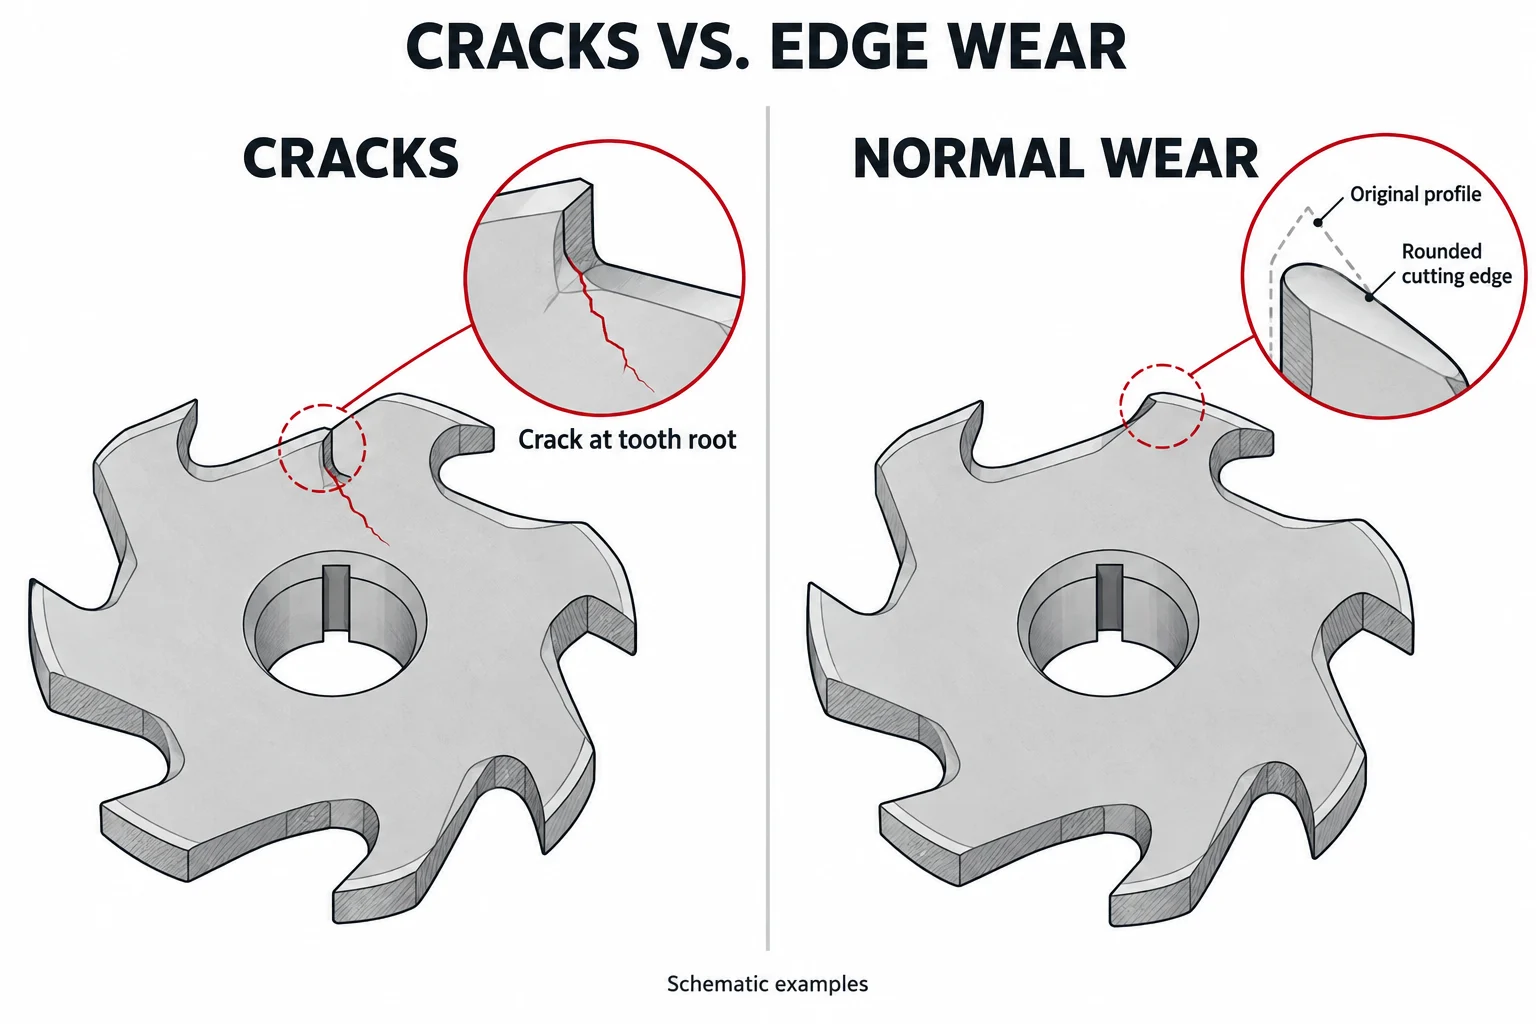
We distinguish between surface cracks and deep cracks running through the whole blade disc. Causes include material fatigue, repeated shock loads, or mistakes during heat treatment. Tiny fine cracks are often hard to spot by naked eyes.
Even small cracks can develop into complete blade fracture under continuous load later on.
3. Normal wear and rounded cutting edges
With operating hours, the cutting edge gradually wears and becomes rounded. There is no sudden breakage. Material shredding quality drops, and the machine power consumption increases.
This type of wear can often be fixed by regrinding, as long as no cracks exist.
4. Overheating and discoloration of cutting edges
Heavy friction under high load leads to overheating. The cutting edge turns blue or brown. The steel loses its hardness after overheating, and the blade will wear extremely quickly afterward.
Common causes: Long time shredding without sufficient cooling, or stuck material blocks.
5. Fatigue fracture
The fracture is not caused by one single heavy impact, but many repeated small loads over a long period. Cracks usually start at the bore hole or tooth root.
This damage is especially dangerous, because it can happen without early warning signs.
How to inspect shredder blades for damage
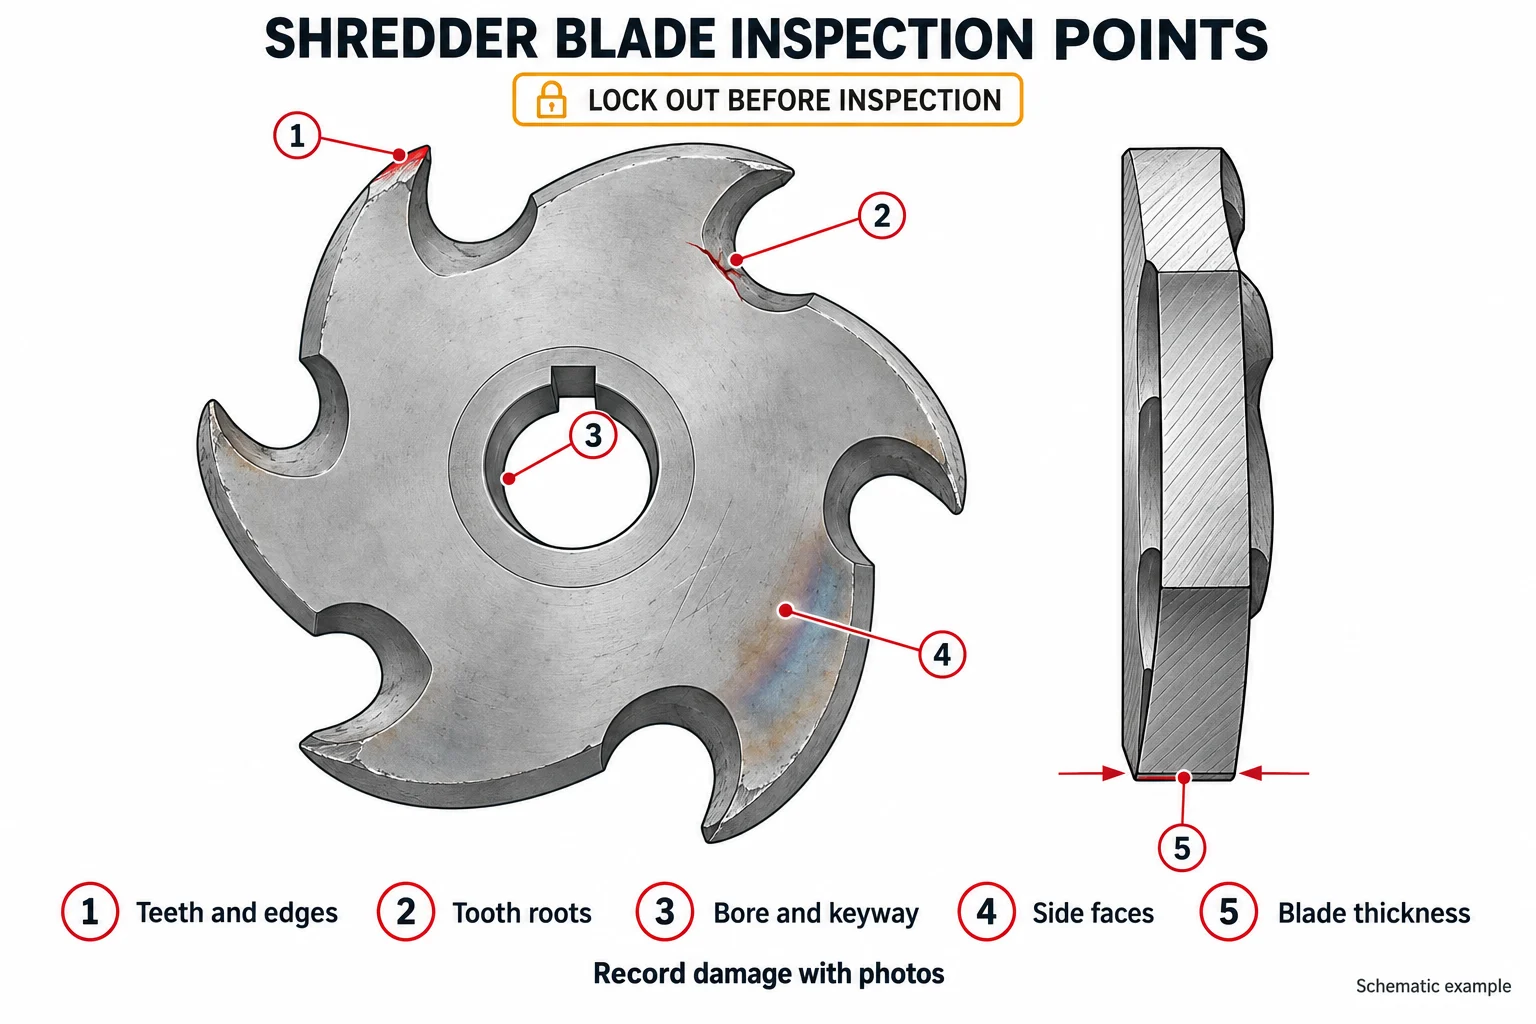
- Lock out and tag out the machine
- Visual inspection of all cutting teeth for chipping and discoloration
- Search for fine cracks
- Measure remaining material thickness
- Check bore hole and keyway for cracks or damage
- Document all damage with photos
Common mistakes in damage diagnosis
Many operators only see visible chipping and replace just one single blade. The real root cause (foreign contaminants, wrong assembly, incorrect shaft gap) remains unresolved. New damage will occur again shortly.
Frequently Asked Questions
What is the difference between chipping and fatigue crack?
Chipping comes from a single hard impact. A fatigue crack forms after many repeated loads over a long time.
Can I keep running a blade with fine surface cracks?
It is generally not recommended. Small cracks can quickly expand under load and lead to blade breakage.
What does blue discoloration on the cutting edge mean?
It is a sign of overheating. The hardness of steel is reduced at that position.
Do I need to replace all blades every time damage appears?
No. It depends on the type, size and location of damage. Inspect each blade individually.
Where do cracks most often form on shredder blades?
Fatigue cracks most frequently occur at the tooth root and around the central bore hole.